Friday, June 27, 2014

DIY -- stud your short for this summer


A five-minute DIY project. Great for summer. 
After adding the studs onto the shorts, I wear this pair of shorts nearly everyday.


The materials you'll need for this project are,
Shorts, or any clothes you want to add some studs to.

Nail polish, if you are not happy with the silver studs and wanna give them a shining bronze look
The nail polish I'm using here is A003 Gold Album by Wet n Wild. I got it from local Walgreens for ~$2. And the Mabelline express finish top coat which I got a long long time ago.

Studs.I got my silver studs from eBay. The link is
They are the cheapest studs I can find online but it took a month or so for shipping.
I actually found this seller from Belinda Selene's YouTube video  https://www.youtube.com/watch?v=Qu7CcAaEW50 
If you are not already a subscriber or follower of her YouTube/instagram, totally check her out. She is just AMAZING.
I used two coats of the gold album. Wait 15 min between coats. And later finish with the clear top coat.
************************************************************
Note: You don't have to do the nail polish part. You can find bronze, gold or even colorful ones in Joann or Micheal's. I just like using what I have in hand.
************************************************************
Then, style with your bronze studs.


My plan is to update a new post every Thursday. But things happened.
I forgot to bring my camera with me for work, so I couldn't blog during my lunch break.
Then at 10 pm Thursday, when I just finished washing my daughter's milk bottles and felt ready to start my post, I heard my daughter cry.
Now look at me, 17 minute post midnight. It's Friday already ;-
Anyway, I was able to finish this one.
Happy Friday.


Thursday, June 19, 2014

DIY miniature couch


It must have done this project a million year ago. Yes, before my daughter was born. Wait, earlier than that! I made this before I was even married.
At that time I was crazy for CSI-Vegas. In Season 7 (?), there is this creepy miniature killer who makes fantastic miniature stuff. That's how "miniature" came into my mind and I started searching in the Internet on miniature DIYs. 

Here is tutorial on how to make miniature couch I found in a Japanese website. 

I can't read a thing there. However, the pictures are straightforward. And I successfully made one.
It took me FOREVER. It took a lot of ALONE time, good peaceful music, a lot of patience.
Oh, look! Compare to a quarter. Not tiny, but small.

Saturday, June 14, 2014

Last minute Father's Day DIY--typography glasses


A five-minute project. All you need is a pair of scissors, black craft paper and a little bit glue.
I bought my black poster paper from local dollar tree for less than $1.

No more instructions needed. Just go ahead to this website,
print out the template and do it.


Thursday, June 12, 2014

Recycle an old tee into pillow case


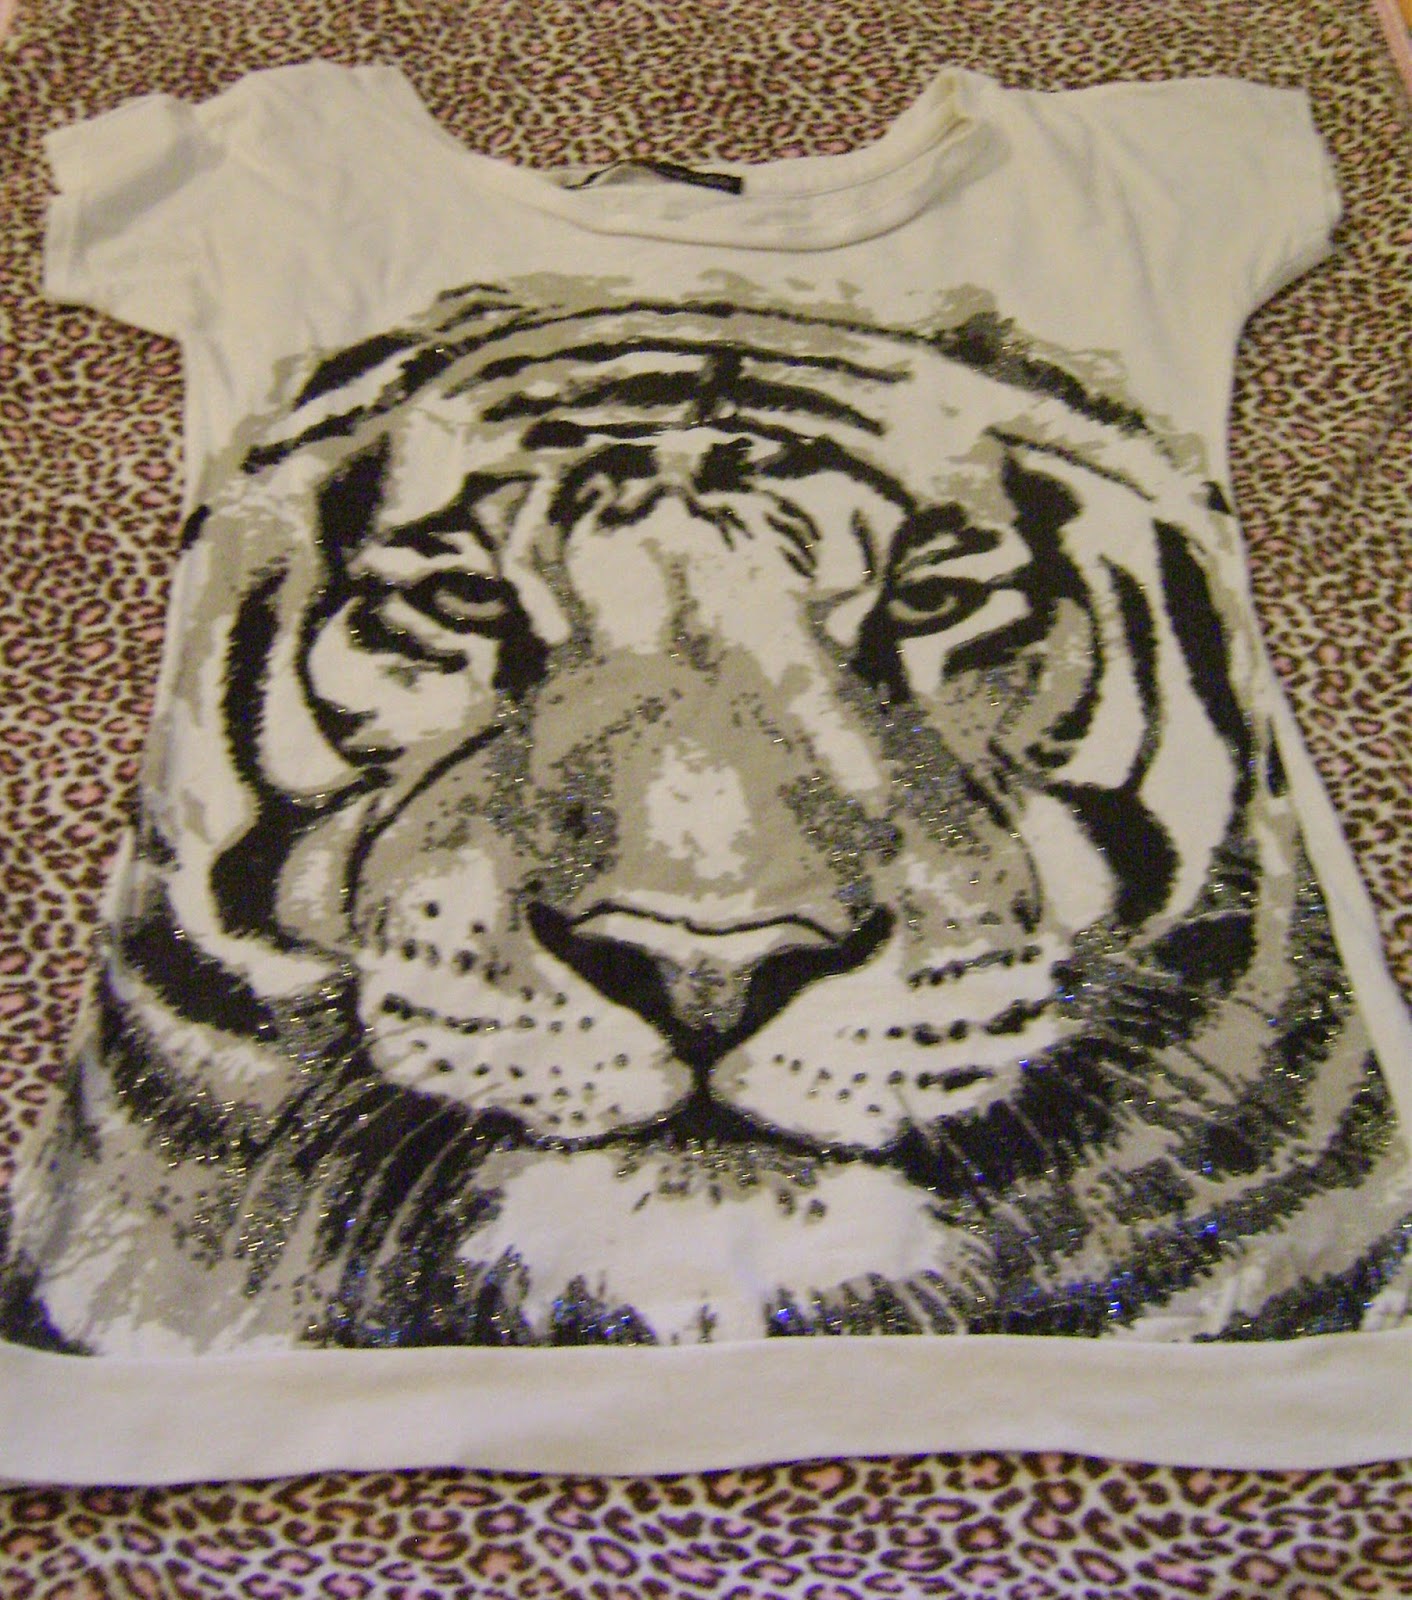
I have the old tiger tee from ZARA. It's been my favorite for at least 3 years.

Highly recommend ZARA. Great quality. 
After 3 years, the tiger print is still like new. The glitter is well attached.
However, the neckline looks a little bit old. 
This is great for my DIY project!

I have a pillow that needs to be redecorated.
First measure the pillow size.

Use an old black tee for the back of the pillow case and the tiger tee for the front.

Cut a 18'+1'(seam allowance) square. And sew along on the back side.

This is the front side.
Now hopefully it fits.

Guess what! It fits perfectly!


Oh, look at the tiger. He looks so proud and elegant.

_____________________________________________________
Update 02/2017,
When this pillow case got old and worn out, I made a another envelope style pillow cover and loving it now.


Thursday, June 5, 2014

Felt bookmarks/hairclip


I made these felt bookmarks a long long time ago. 
This is NOT my original idea. I found this cute felt bookmark in this blog,
I fell in love with this little heart shaped bookmark and of course I made some for myself.


 I tried to make them match the books I was reading at that time. 

I gave two of them away to my friends. Now I only have the pink one. 
And I don't read as much as I did. My poor bookmark was just sitting there doing nothing. 
I have a baby. So I figured I could just turn this cute little felt bookmark into a hairpin.

I did it. This is how it looks.

I love how it turned out.


Thursday, May 29, 2014

Decorate wall planner

 Before the end of May, I need to have a post about how a decorated my wall calender for this month. 

It looked like this in March and April. Not organized. Not cute at all.

I started from cleaning it. 
This is a laminated wall planner. The size is like a poster.
I didn't buy the cleanser for this planner.
I just used baby wipes. It worked great.
For some tough spots, I used nail polish.
To decorate it, I used the window cling decals from local Target. 
They are Easter themed decors. Since it's not for Easter decor, I just used the sun, flowers and butterflies and skipped the Easter eggs and bunnies.

Keep this in mind!!! A week after Easter, they are 90% off. 
I got them for 25 cents each. I think I got 4 of them.


It looks pretty cute except for the marker holder.

As you can see, I cut girl scout cookie box and turned it into a marker holder. 

For the outside of the holder, I used some matching color wrapping paper.
And I used acrylic paint (white, Micheal's <$1).

I like how it turned out.

Final look!!!

Thursday, May 22, 2014

Weekend DIY - Butterfly pens

 I saw this paper butterfly in Pinterest last week and immediately decided to try it.
The original post is Cute DIY Butterfly Ideas 
That post is full of diy butterfly ideas. Totally check it out!


Here is what you need to make the butterfly pen.
To make the paper butterfly, you need,
poster papers in various colors, dollar tree <$1/each
sharpie
liquid paper correction fluid 
To decorate the pen, you need,
wire
tape, I used washi tape, local Target, $2.5
a boring looking pen


  Here is how I made the butterfly.

You can use this to decorate anything you like or just put it somewhere on your desk. 

But I used it to decorate my pen.

There you go. You have beautiful pens that might make you want do some homework!