Showing posts with label revamp. Show all posts

Sunday, June 4, 2017

How to Hem Dress Pants WITHOUT Sewing Machine: Blind Stitch Tutorial


Hello everyone. It has been a while since I posted my last project. I started a Youtube Channel Cis4Crafting earlier this year and has been posting videos every week over there. If you like what you see here you probably will enjoy my videos over there. Feel free to stop by.

Today I'm showing you how you can hem a dress pants/dress/skirt without using a sewing machine. I do have a sewing machine-not a fancy kind but I love it. I love hand sew stuff. I don't know how to explain that. Yes, if my project involves a huge piece of fabric I'll definitely use the sewing machine. However, I like just holding the needle and pull the threads when doing small projects like doll clothes, kids clothes, embroidering and in this case hemming pants.

I just learned this hand stitching recently. It is called blind slipstitch. I have found a photo from Pinterest that explains it really really well. It is Four hand stitches you need to know by Byhand London.

Read that first if you want to try this hemming technique. I think that post explained it better than I did in my video. But you'll welcome to read thru my post and watch my video.

You only need,
thread, similar color to your pants, if you have limited options of thread, use white for light color clothes and black for dark.
needle
ruler
fabric marker
scissors.

I summarized this blind stitch as "catch->tunnel". You'll see what I meant in the video.
Here is the tutorial.


Hope you have the chance to practice in your pants. Job hunting + interview season!!! Good luck to those who are looking for new jobs. See you next time!


Saturday, July 11, 2015

Weekend DIY - revamp a toddler jean dress


I personally like this jean dress. But for a almost 2 year old girl, some color would be nice.

A closer look of the dress.


This is where I got the inspiration. The Gymboree dress- pink flower on the jean dress.

So I simply changed the buttons and added a felt flower on the belt.


Monday, June 29, 2015

Weekend DIY - butterfly appliqued kid's pants (fix hole in kid's pants)


My daughter fell from the slide a couple of weeks ago. She is OK. But oh, no, not the first time she wore this pair of summer pants. A hole in the new pants.

I already have this vision of this butterfly top to go with this pair of grey pants. So why not using a butterfly patch to cover up the hole. Butterfly pattern came straight from the shirt.

I used a piece from pink tee fabric from my old tee to match the color of the pink petal. And I hand sew the pink butterfly piece into the pants using the dark purple thread to match the butterfly tee.

Here is the final look.


Thursday, December 4, 2014

Repurpose an outgrown onesie into a ruffle top


You probably have noticed that the months in your baby's onesies don't mean anything. Your baby may fit in Gymboree's 6-9 months tee but Carter's 9-12 months seems too short for her/him. 

What makes me frustrated is the onesies that are fat but short. Like this one. It is a gift from my hubby's colleague. It is cute. It has bright color. But it is too short. 

What I did is I simply cut the bottom.
Add ruffle of the similar color (from my old tee).
And now I have a well fit ruffle tee for my daughter.
Very simple. If you have a similar problem, I hope you give it a try. It literally took me 15 minutes.

Tuesday, November 11, 2014

2014 Halloween DIY little cat costume


I got this whole idea from watching Britney's halloween (2013) vlog from Britneyandbaby.https://www.youtube.com/watch?v=u-EwxXnDLP0 Big fan, big fan of Britney and Aria!!!

OK. There are five parts in this project. Don't panic yet. All of these are easy straight forward steps.

1. Let's start from the easiest part, the shirt. To make the shirt, I used a black tee I bought from Walmart and the gorgeous leopard print iron-on letters from local Michaels.

2. The pants. I used a pair of black pants and pink faux feather.


3.Cat tail. I used black felt fabric. Cut into a cute tail shape.
 Flip it over.
 Of course, I need to sparkle the tail tip using the rhinestones.
To see how to decorate using rhinestones, go ahead to my previous post.DIY cute rhinestone bling initial shoes
 Then I used a bar pin to attach the tail to the shirt.

 
Now take a look at the pants and the tail together. Cute, isn't it.
 

4.Cat ears. I don't want this post to be extremely long, so I decided to have another separate post about the cat ears. This is my favorite part. You know how much I like to make hair accessories for my daughter.

Here is the detailed look of every part I made.

 
Happy DIY!

Thursday, July 3, 2014

DIY July 4th eraser stamped onesie


I've been looking for ideas to diy something July the 4th for my little girl. I mainly focused on the hair accessory like hair clips b/c there are easy and usually takes a little bit time to make.

Yesterday, I found this post from Pinterest. DIY Eraser-Stamped 4th of July Shirt

Oh, lucky me. It looks easy and I totally have everything that I need to make this eraser stamped tee (I'm actually doing a onesie...).

Let's get started.

You'll need:
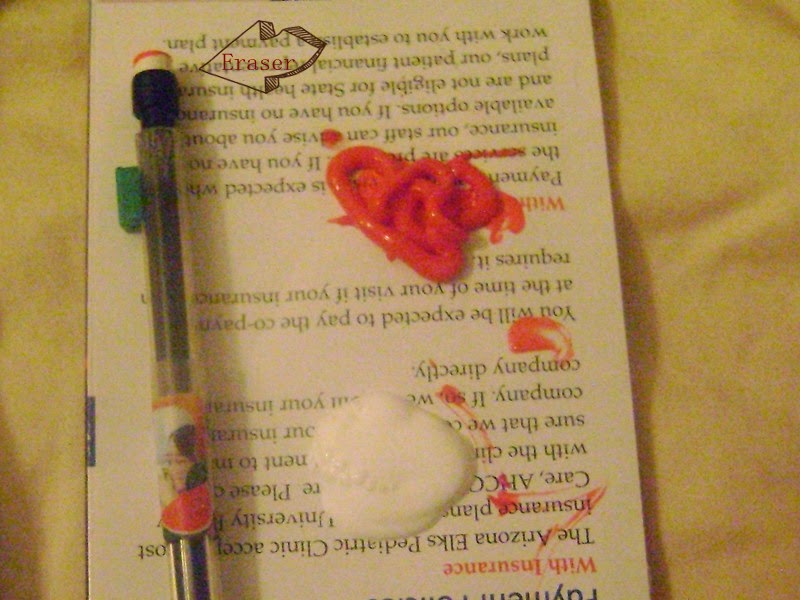
Eraser: it's missing from the pic!!!!! Use the pencils that have eraser on the top.
Onesie of your choice. Mine is from Carter and already has star pattern on it.
Star template. Google image, print and cut. My dear hubby did this part for me.
Fabric paint: white, red and white
Washable crayon, from my daughter's art box. I bought it from local Target.
Masking tape, Dollar Tree
Cardboard or notebook

Step 1 Put the notebook in between the fabric so you have a hard steady place to work on. Draw the star shape on the front of the onesie (eyeball to center it) using the crayon

Step 2 Masking-tape the star shape
Step 3 Get your working station ready. When I need to paint, I always use an old bed sheet.
Step 4 Stamp, Stamp and Stamp. Have fun!

Step 5 Remove the masking tape.
Step 6 Let dry and dress up the baby!


Friday, June 27, 2014

DIY -- stud your short for this summer


A five-minute DIY project. Great for summer. 
After adding the studs onto the shorts, I wear this pair of shorts nearly everyday.


The materials you'll need for this project are,
Shorts, or any clothes you want to add some studs to.

Nail polish, if you are not happy with the silver studs and wanna give them a shining bronze look
The nail polish I'm using here is A003 Gold Album by Wet n Wild. I got it from local Walgreens for ~$2. And the Mabelline express finish top coat which I got a long long time ago.

Studs.I got my silver studs from eBay. The link is
They are the cheapest studs I can find online but it took a month or so for shipping.
I actually found this seller from Belinda Selene's YouTube video  https://www.youtube.com/watch?v=Qu7CcAaEW50 
If you are not already a subscriber or follower of her YouTube/instagram, totally check her out. She is just AMAZING.
I used two coats of the gold album. Wait 15 min between coats. And later finish with the clear top coat.
************************************************************
Note: You don't have to do the nail polish part. You can find bronze, gold or even colorful ones in Joann or Micheal's. I just like using what I have in hand.
************************************************************
Then, style with your bronze studs.


My plan is to update a new post every Thursday. But things happened.
I forgot to bring my camera with me for work, so I couldn't blog during my lunch break.
Then at 10 pm Thursday, when I just finished washing my daughter's milk bottles and felt ready to start my post, I heard my daughter cry.
Now look at me, 17 minute post midnight. It's Friday already ;-
Anyway, I was able to finish this one.
Happy Friday.