Friday, August 22, 2014

Travel tips -- FREE organize cubes/container


We are heading to Florida tomorrow for a short vacation. Yeah!!!
I wanna share with you very simple packing tips using FREE organizers/cubes/containers.

1. hair accessory bag--FREE

 I kept this cute package for panty liners because it's so cute! It holds five hair clips (three shown in the picture, more added later) and a box of of hair elastics.

2. all beach essential in one bag--Free

I like the idea of having cubes packing different categories of stuff so nothing shifts in the luggage. I always keep the heavy duty plastic packages that come with the bed sheet, mattress cover or gift set of lotion/nail polish etc. 

3. old contact lens case?--- travel size lotion container!--FREE

 Have you got an old contact lens case sitting around doing nothing? Now it's time to use it. Left for day use moisturizer with SPF and right for night cream!

4. Samples--FREE

Yes. Samples. Do you shop in Sephora or Drugstore? You must have a lot of samples. Now it's time to bring them with you and use them!

5. Jewelry  organizer--only $5

Three layer jewelry box. First layer, bracelet. Second, rings and ear studs. Third, necklaces. Snap button, everything is safe here now.
 I got this from ebay. http://www.ebay.com/itm/371077180828?var=640244865691&ssPageName=STRK:MEWNX:IT&_trksid=p3984.m1497.l2649


Enjoy the rest of the summer!


Thursday, August 14, 2014

DIY Happy 1st birthday tee for little boy


My nephew's birthday is in August. He is one year old now! Only 35 days younger than my daughter.
I wanted to send him something special for his first birthday.
Here is my DIY first birthday tee.
I bought two plain tees from local Target. They cost $5 each.
For the white one, I decorated it with the number 1.
The felt chevron patter fabric is from local Walmart. Pretty, isn't it. Simply cut out the shape.
I used the "heat and bond" to attach the felt "1" to the tee. Use the purple package if you want sew later.

Then I used white thread to further secure the number.
It's done! A 10 minute project.

**************************************************
The second one is a red-grey stripe tee. I thought some blue letters will stand out.
I bought some iron-on letters from local Walmart. I believe they are less than 4 bucks.
Follow the instructions on the package.
Cut apart the letters and place them as desired. The transfer sheet (shiny plastic looking layer) side up.
Set the iron on "cotton" setting. Evenly apply heat to each letter.

Peel off the transfer sheet.
The letters have the flocked texture.
And final look.

Thursday, July 24, 2014

Grow with La Petite 2 -- hand / foot print art


April
Easter--paper Easter basket
 In the basket, we got candy, a bunny straw and a tiny book (somehow not here in the pic). 
My hubby and I ate the candy and little Christina had fun playing with the plastic eggs and straw.


May
Mother's Day Card by Ms Cherie

Mother's Day hand print flower by Ms Glenda 


 Flower by Ms Glenda

June
Father's Day "you rock" card by Ms Cherie
We glued this on the back of my guitar (real guitar)
.

Busy bee foot print


Friday, July 18, 2014

Grow with La Petite 1-----Hand print / foot print art

My daughter started daycare in January at 6 month of age.
I have interviewed a few daycares nearby and chose La Petite Academy.


January

snowman
by Ms Cherie

February

XOXO
by Ms Glenda


Love cat
LOVE


March

owl
Butterfly

by Ms Glenda

St Patrick's Day

Bug magnet


Thursday, July 10, 2014

DIY mini birthday princess crown


Yesterday was my little girl's first birthday! Yeah!
A few weeks ago, she fell in the daycare and her upper gum and teeth got hurt. The teacher in daycare told me that she was trying to stand on her own but her dress was on the way. So no more dress until she can walk.
Since her princess dress is out of the picture on her birthday. I wanted to make her something special. And I did some search in Pinterest. Here is the link if you are interested.  http://www.pinterest.com/superbearsam/princess-theme-birthday-party/

A mini princess crown was what I decided to do. I did not search hard for a tutorial or template because I think I can pretty come up with a mini crown template pretty easily myself. 
Here it is. Just sketched on my sketch paper.
 Then I cut two pieces of felt fabric. One slightly smaller than the other. Don't forget to cut a "1" for 1st birthday.


I always use my daughter's crayons to trace pattern because they are water washable. I use white crayon for dark fabric and colorful ones for light color fabric.

Hand stitch the "1" to the smaller felt (pink)

Then hand stitch the pink felt to the bigger white piece.

Stitch two edges together to form a round shape (not shown in pic) and cut a round piece for the bottom of the crown. Stitch the bottom on. 

Then on the bottom, hot glue hand band or hair clip. It's up to you.

Oh, don't forget to glue some rhinestones.

My neighbor's daughter Emily is just one day younger than my daughter. She is now spending summer in China with the grandparents. So, instead of "1", I put "e" for "Emily."

Same procedure.
 There! Happy birthday, girls.


Thursday, July 3, 2014

DIY July 4th eraser stamped onesie


I've been looking for ideas to diy something July the 4th for my little girl. I mainly focused on the hair accessory like hair clips b/c there are easy and usually takes a little bit time to make.

Yesterday, I found this post from Pinterest. DIY Eraser-Stamped 4th of July Shirt

Oh, lucky me. It looks easy and I totally have everything that I need to make this eraser stamped tee (I'm actually doing a onesie...).

Let's get started.

You'll need:
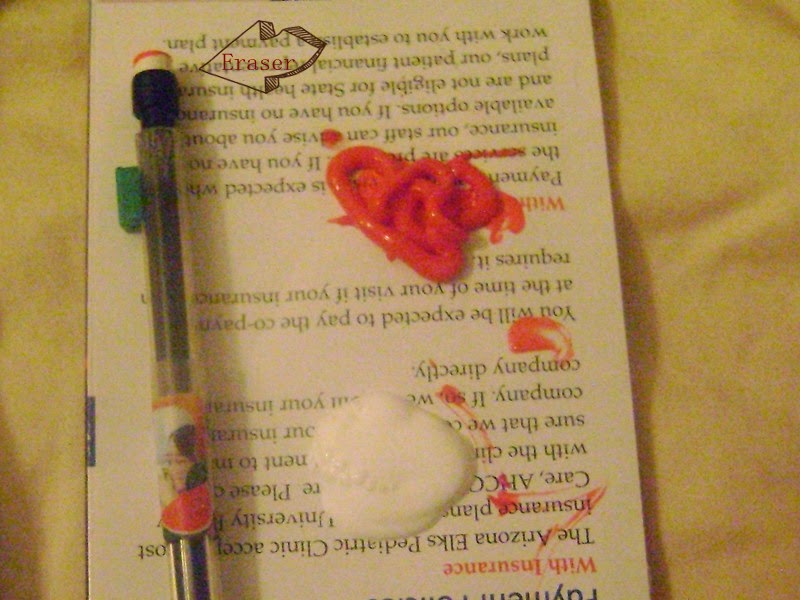
Eraser: it's missing from the pic!!!!! Use the pencils that have eraser on the top.
Onesie of your choice. Mine is from Carter and already has star pattern on it.
Star template. Google image, print and cut. My dear hubby did this part for me.
Fabric paint: white, red and white
Washable crayon, from my daughter's art box. I bought it from local Target.
Masking tape, Dollar Tree
Cardboard or notebook

Step 1 Put the notebook in between the fabric so you have a hard steady place to work on. Draw the star shape on the front of the onesie (eyeball to center it) using the crayon

Step 2 Masking-tape the star shape
Step 3 Get your working station ready. When I need to paint, I always use an old bed sheet.
Step 4 Stamp, Stamp and Stamp. Have fun!

Step 5 Remove the masking tape.
Step 6 Let dry and dress up the baby!